Section 3 Workflow Overview
If you are not already a member of the ROSSyndicate GitHub Organization, please Teams Katie Willi to add you!
3.1 Starting a new repository
From the ROSSyndicate Organization landing page, create a new repository (‘repo’) with the appropriate naming convention (short/concise, no spaces). Elect to start the repository with a README.md file and a MIT use license file. After you’ve initialized your repository, go in and edit the third line of the license file to read: ‘ROSS - Radical Open Science Syndicate and all contributors’
Add collaborators with write/push access by going to repo Settings -> Manage Access -> Invite a Collaborator.
After you have forked the repository to your account, clone the repo to your local machine (see Forking and Cloning ROSSyndicate Repositories).
Once the repo is stored on your local machine create the general architecture for your repository.
Create a basic folder structure for your project. Below are some folder types that you may wish to include at the initiation of your project.
data: folder containing data sourced throughout the pipeline. For internal project, this should be a SymLink folder to a OneDrive folder (see ‘Data and OneDrive’) . For external projects/deliverables (with datasets that do not trigger large-file errors >100mb), this can be a folder that contains data files that travel with and are tracked by the repository.
src: folder containing scripts for the analysis completed in the repository.
out/output: folder that contains and tracks output of your pipeline. This could include figures, summary data, etc. Your out/output folder could also live within the data folder, depending on the size of your project output.
Populate the README.md with some basic information, including the primary contact for the repo, and what the repo is all about. Also include the following use license blurb: ‘This repository is covered by the MIT use license. We request that all downstream uses of this work be available to the public when possible.’
Populate the .gitignore to ignore any folders or files that should not be tracked. At a minimum, add these to all .gitignore ’s:
Create an R project associated with the repository directory.
Commit and push these changes to your forked repository, then create a pull request to your creative partner (see ‘Collaboration workflow overview’).
3.1.1 Creating a SymLink Folder
As stated above, we tend to use SymLinks to shared OneDrive folders. To set up
a data SymLink folder on a Mac, from a OneDrive path that ends with /data/,
you can use the following command in the terminal with the .Rproj open:
ln -s ~/path/to/linked/folder/called/data/ .The . here means that you want that data folder to be called data as a
subdirectory at the root of your current .Rproj.
For Windows machines, you do have to state what you want the name of the new junction to be with the symlink. The folder specified as the target should not already exist. This should be done in a cmd terminal.
mklink /j "C:/path/to/put/new/linked/folder/data" "~/path/to/existing/OneDrive/folder/called/data"3.2 Forking and Cloning ROSSyndicate Repositories
Go to the ROSSyndicate repo for the project and click “Fork”.

Follow the prompts to create a forked repository on your personal GitHub account, which is where you will make changes and edits prior to making a pull request to incorporate your changes to the primary repository.
Clone your forked repo to your local machine using the terminal in R or a command-line interpreter.
Make sure you have navigated to the directory where you would like the cloned repository to be stored. See this tutorial on command-line basics so you know how to navigate at the terminal. Most folks in the lab create a ‘GitHub’ directory within our Documents folder, but we don’t have any required location for where you store your local repository.
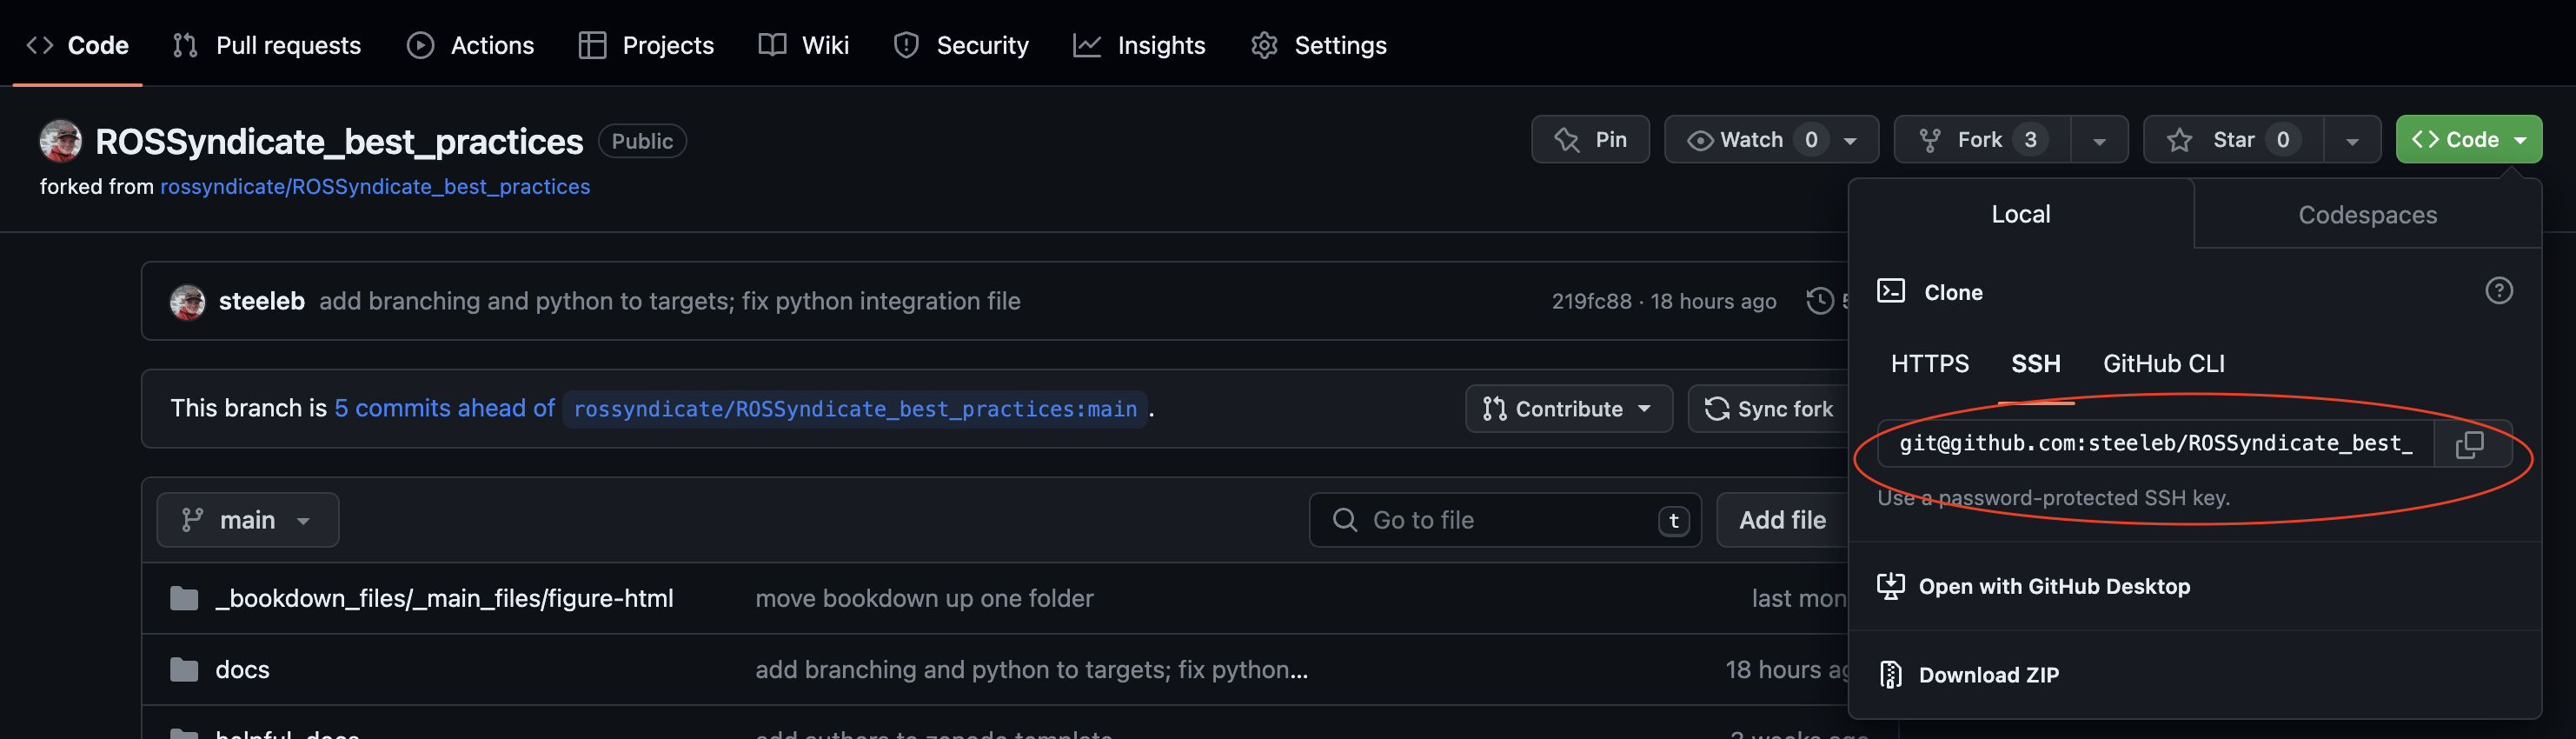
Then, clone your repo! You can acquire the
ssh_addressfrom your forked repository on the GitHub website. If I were cloning the repo below, I would replacessh_addresswithgit@github.com:steeleb/ROSSyndicate_best_practices.git clone ssh_address
3.2.1 Setting up SSH across GitHub and your machine
While you can use either HTTPS or SSH authentication to connect your machine to your GitHub repositories, we now suggest using SSH authentication, which is a bit more secure.
In order to use the SSH cloning method above, you will need to set up a SSH token and agent on your machine. GitHub has a great overview of SSH protocol here.
To quickly get started with SSH follow the directions in the sections “Checking for existing SSH keys”, “Generate new SSH key”, and “Add a new SSH key”.
3.3 Collaborative Coding
(Note, the workflow for this is slightly different if you are working in feature branches. Please see that section if you are working in feature branches.)
Always start your day by fetching upstream changes from the primary repository by typing the following in the terminal. This is part of the way we avoid merge conflicts down the road.
git fetch upstream
Work on your local repo, commit, edit, commit, edit, commit. See ‘Commit history best practices’ for advice on great commits. Commits are made in your terminal with the following commands:
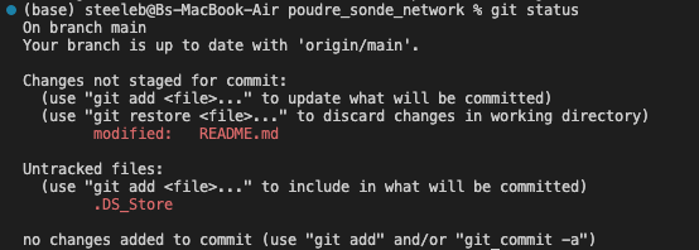
git status
This will show you what files have changes, and which are staged for your commit.
Now, stage the files for your commit.
git add filename.ext filename2.ext
Check to see that you’ve staged the correct files for your commit with git status It will look like this:
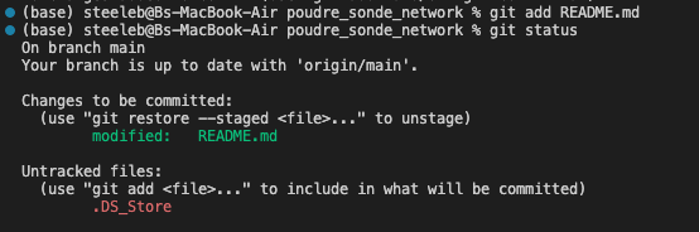
If you are happy with the files listed under ‘Changes to be committed’, make a commit!
git commit -m “insert commit message here”
Push your commit history to your forked repository.
git push origin main
Submit a pull request to your internal creative partner or engage other members of your project team through a pull request. See ‘Pull Request best practices’ below for details.
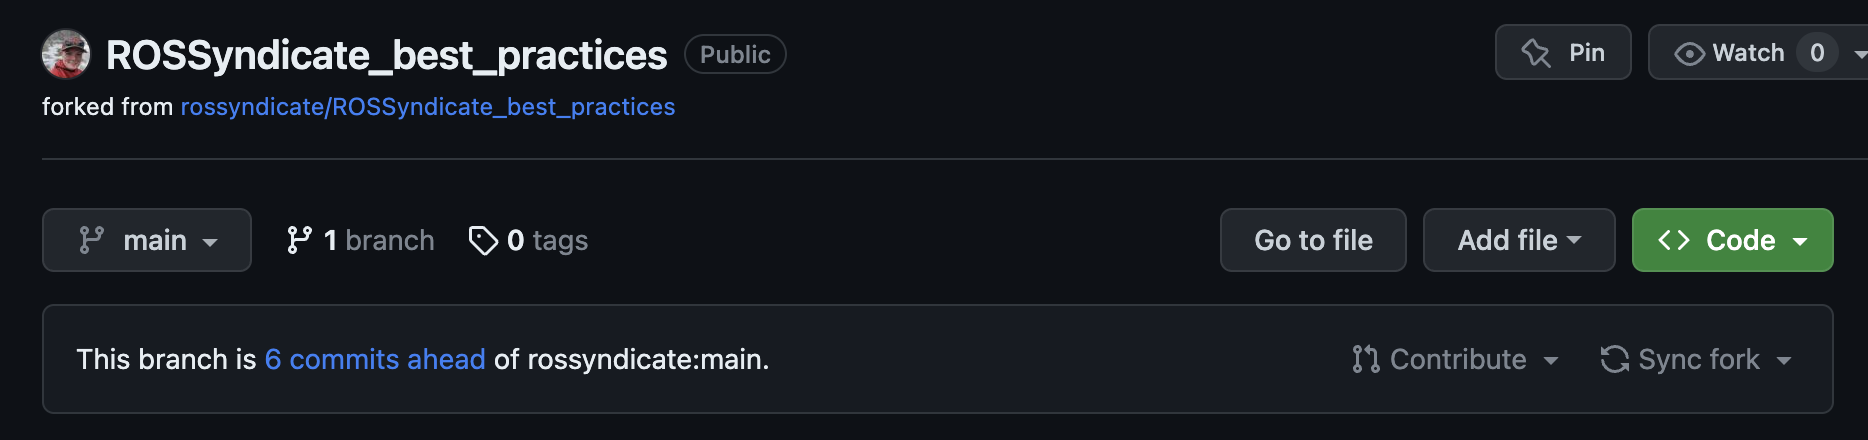
Navigate to your forked repository.
Confirm that your branch is up-to-date with the upstream repo by clicking on ‘Sync fork’.
Then, click ‘Contribute’ and ‘Open pull request’.

Craft and submit your PR!
Add a title and description of your pull request, making sure your PR conforms to the ‘Pull Request best practices’ recommendations. Pull request descriptions and comments are written in Markdown, so take advantage of embedding images, emojis, text blocks, etc. You can also associate specific commits and issues with markdown text using the hash ‘#’.
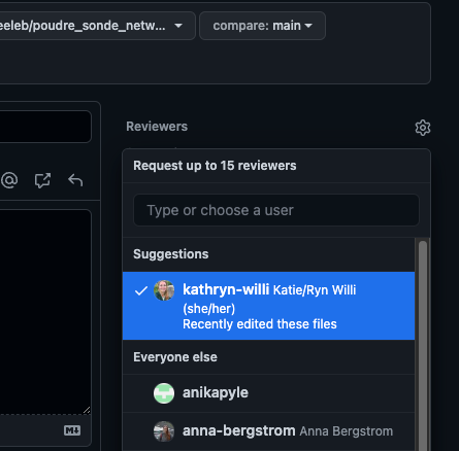
Check “Allow edits from maintainers” to allow other collaborators to make changes to your pull request and in the right hand side, assign a reviewer (in this case, your internal creative partner or whomever you’d like to engage in this pull request).
Click “Create Pull Request”.
Internal creative partner (or engaged individuals) reviews the pull request according to ‘Pull Request Review best practices’ following the process outlined in GitHub’s How to Review Pull Requests. If no changes are required, the reviewer will merge the branch, but if any comments have been made on the pull request, leave the merging to the PR author.
3.4 Addressing merge conflicts
There are multiple ways to deal with merge conflicts. You can address them within the GitHub conflict editor. Alternatively, you can use the command-line method is described here, but this method requires some advanced skill and understanding of command line git. If you’re using VSCode, and have the ‘GitHub Pull Requests and Issues’ extension installed, this is a very user-friendly way to deal with conflicts, too.